

Our first project in our studio class started with a class meeting at Belle Isle. We were instructed to bring some large sheets of newsprint and charcoal. We spent the three hours sketching 3 spaces along the James River. After we did that we were to choose one spot and determine a 10'x10' area that would be our area of study.
Sounds great, doesn't it? I thought so. Then, I sat on a rock. And was bit. TWICE. Don't worry, I fought through the stinging pain and got my drawings done (and with the help of a nearby camp counselor got some sting cream too!)
Here is the space I chose- it's a spot where the river meets the edge of the rock:


Sitting in my spot, you can see a perfect view of Hollywood cemetary across the river.


I thought it deserved at least a rouch sketch (an indulgence that probably was not part of my assignment...whoops!)

Eventually, we were asked to study our space completely: go above the water, below the water etc. WE were to do 20 sketches/studies and at least 3 models of our space. Here are a few sketches...


Just to let you in on my process a little bit, I find that it's easier to plan out my models before I do them. Because of this, I get alot of pages that look a little something like this:
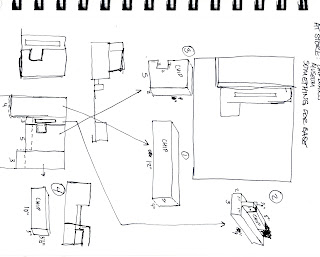
And they turn into something like this:

The above model was an effort to show the volume of the space to scale (we were not allowed to use curves- only 90 degree angles). The chipboard represents the rocks and the white represents the green.


The last model I did I was studying how to show different types of water. I categorized the water (fast, smooth water, stagnant water, white water, slow, smooth water). Then I tried to think about how they would be shown in a model.

So, that's the river project! Sorry I haven't posted in a while- my computer caught a virus and I had to take it to the doctor. It's all better now though! :)

And they turn into something like this:

The above model was an effort to show the volume of the space to scale (we were not allowed to use curves- only 90 degree angles). The chipboard represents the rocks and the white represents the green.
The model below was done in order to show a little bit more about the layers of the spaces and how the rock and the water react to each other.

After the two "big" models, I did a couple of smaller models that zoomed in on certain spots in my space. I started by doing one that showed the topography of the rock a little bit more and I tried to show how the water reacts (which is really hard to do with paper!)


The last model I did I was studying how to show different types of water. I categorized the water (fast, smooth water, stagnant water, white water, slow, smooth water). Then I tried to think about how they would be shown in a model.

So, that's the river project! Sorry I haven't posted in a while- my computer caught a virus and I had to take it to the doctor. It's all better now though! :)


